

This is the checklist I run through on every site I build in Framer, in the order I do it.
Framer is one of the better website builders for SEO out of the box. The site loads fast, the code is clean, and the sitemap and robots.txt are generated automatically. But out of the box only gets you so far. The settings that actually drive rankings need to be turned on by you.
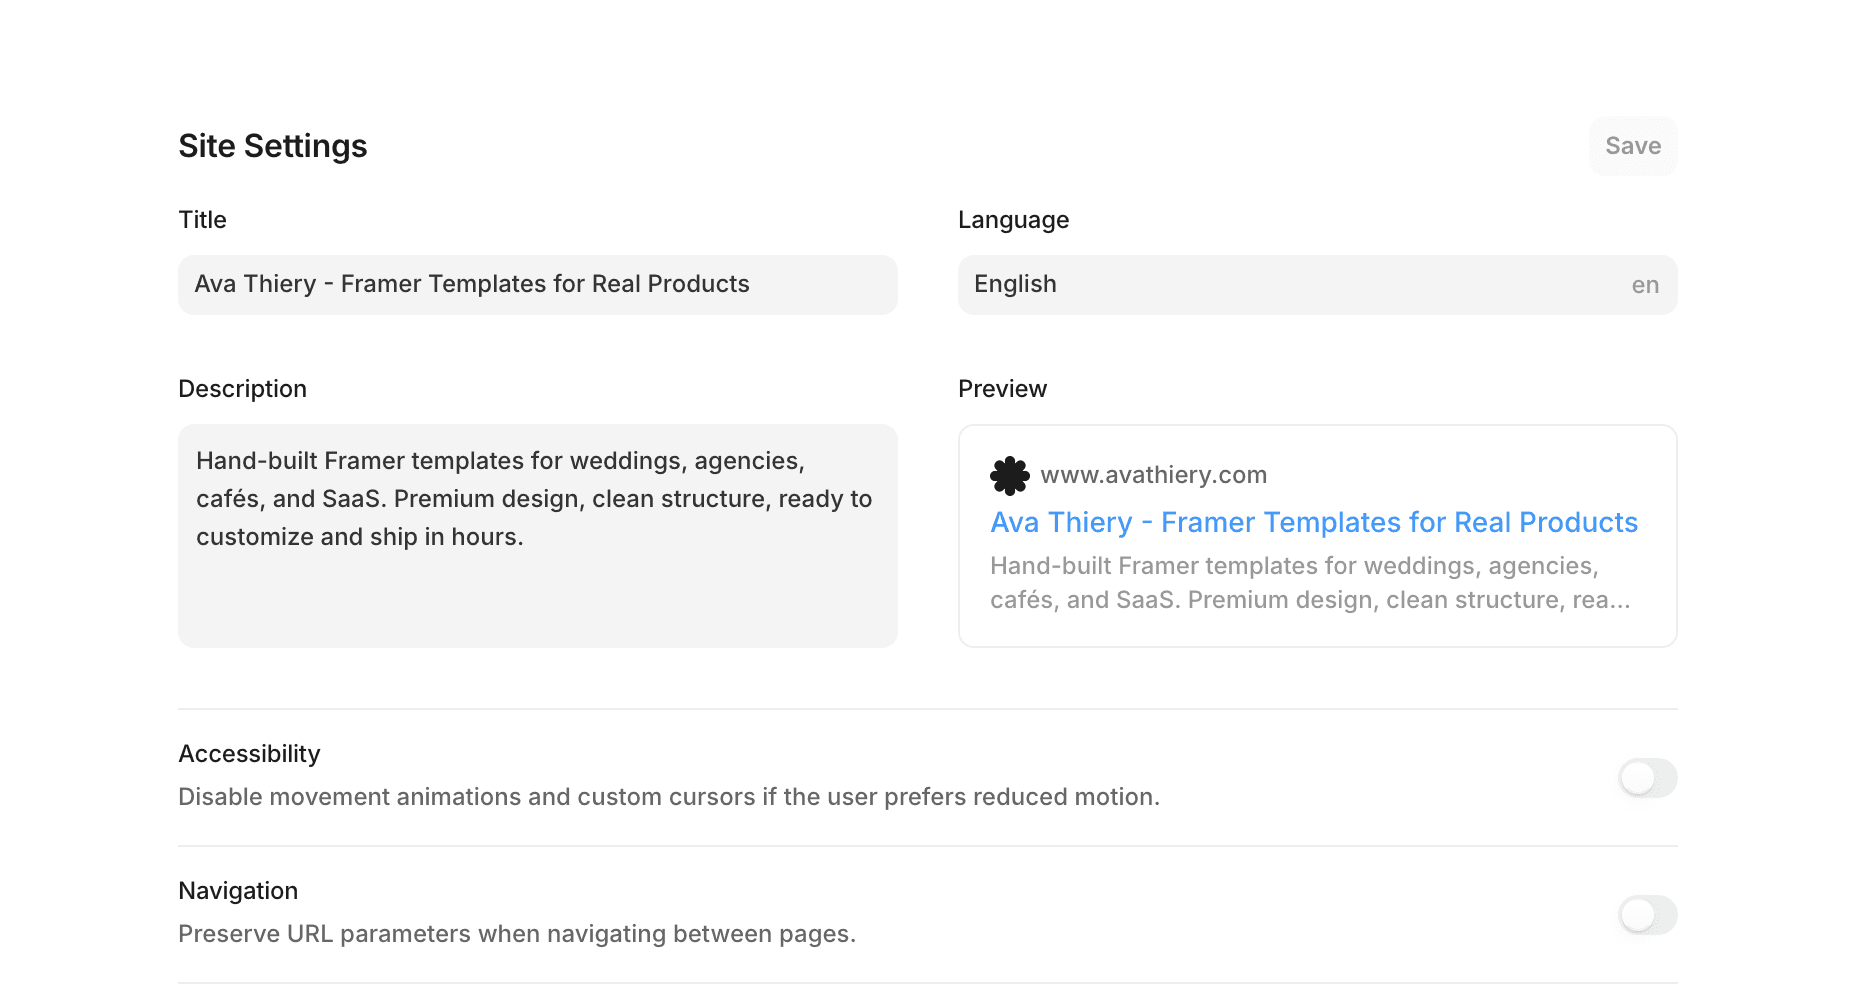
1. Set your site title and description
Open Site Settings, then General. Add a site-wide title and meta description. The title should include your brand or main keyword and stay under 60 characters. The description should explain what the site is in plain language, under 160 characters.
This is the text that shows up in search results and on social shares when no other meta is set. Don't skip it.
2. Add page-level meta titles and descriptions
Every important page needs its own title and description. Site-wide defaults are a fallback, not a strategy.
Click any page in the layers panel, open its settings, and fill in the SEO fields. Each page should target a specific search intent. Your homepage is for your brand. Your services page is for what you do. Your blog posts target individual topics.
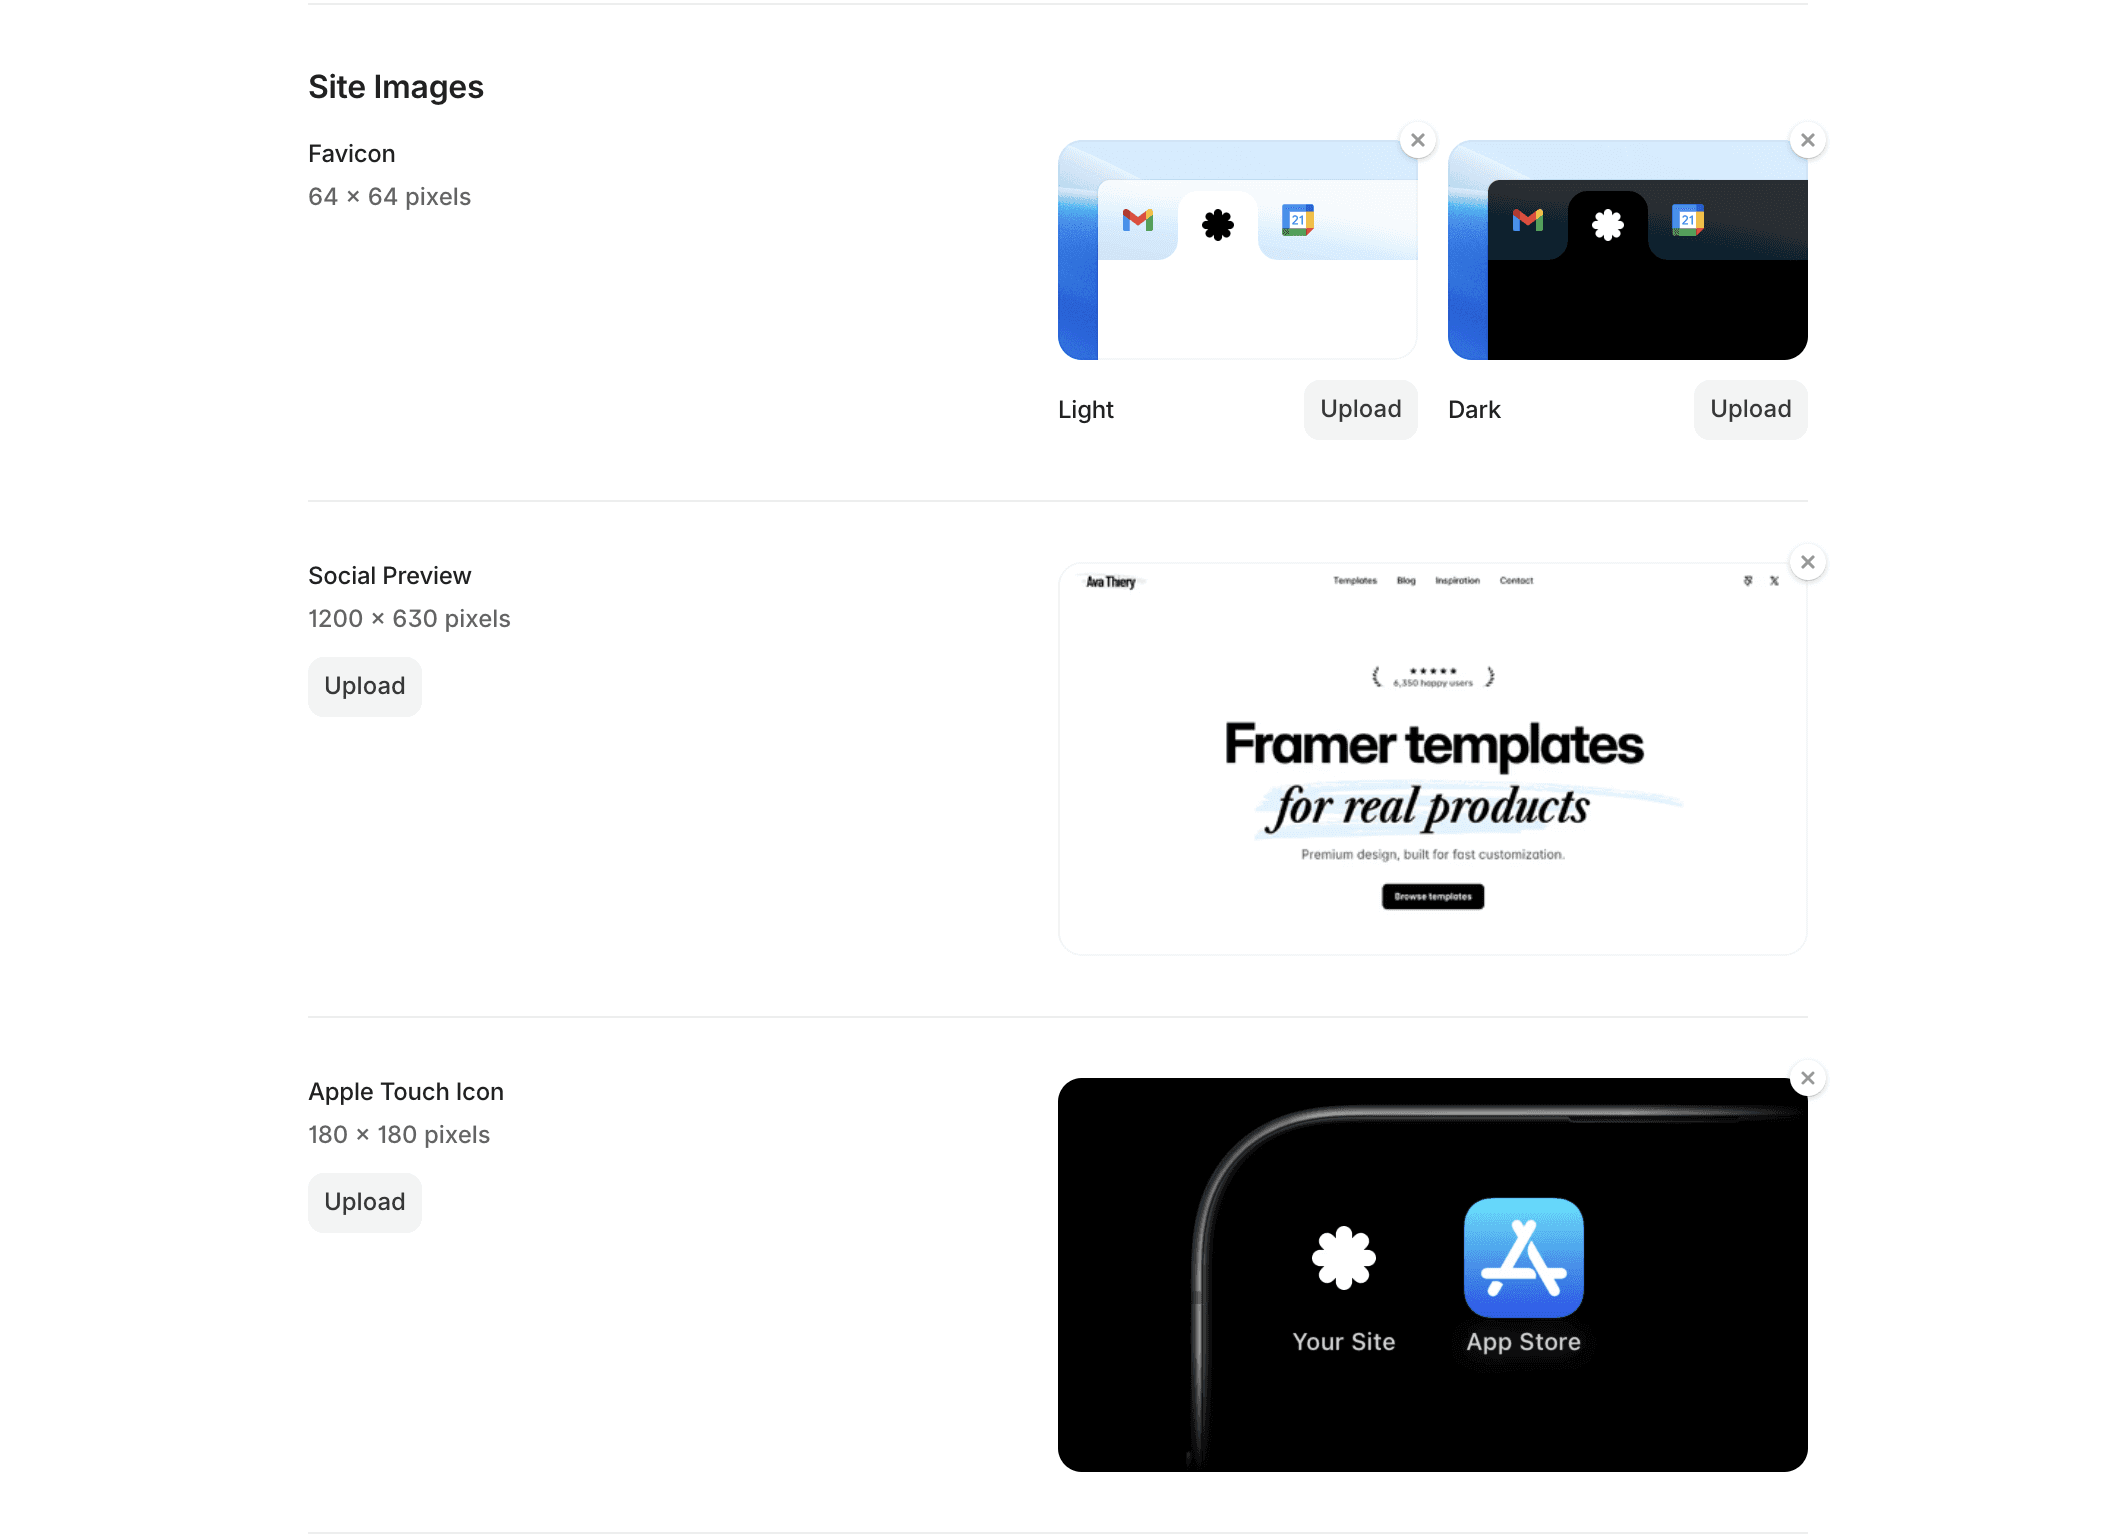
3. Set Open Graph images
Open Graph is what determines how your site looks when someone shares it on social media or messaging apps. Without it, you get a blank rectangle and a default URL.
In each page's settings, upload an Open Graph image (1200 by 630 pixels is the safe size). Use something that actually represents the page, not just a logo.
4. Write descriptive URL slugs
Framer lets you customize the path of every page and CMS entry. Keep slugs short, lowercase, and hyphenated. your-site.com/wedding-templates beats your-site.com/blog-post-2026.
For blog posts, the slug should reflect the topic, not the date or post number.
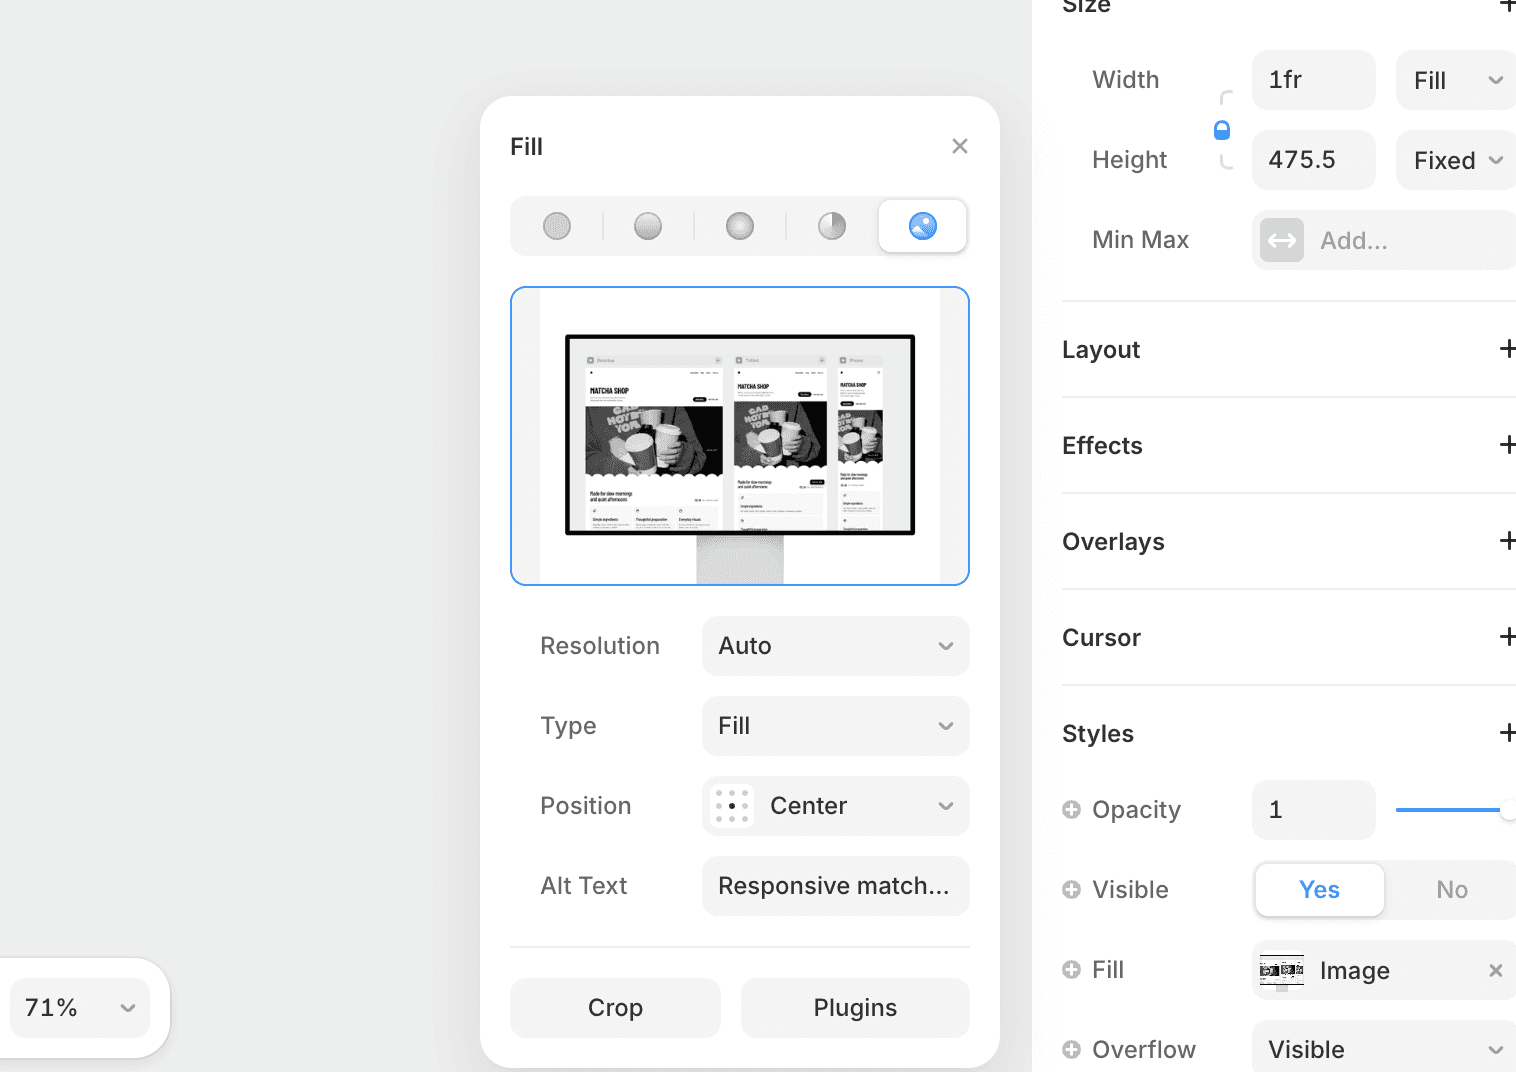
5. Add alt text to every image
Open each image layer and fill in the alt text field. Describe what's in the image as if you were telling someone over the phone. This helps screen readers and search engines understand your content, and it's one of the easiest ranking improvements most sites skip.
6. Use proper heading hierarchy
One H1 per page. H2 for main sections. H3 for subsections under those.
Framer makes this easy through the Type panel, but it's worth checking each page manually. A page with six H1s confuses search engines about what the page is actually about.
7. Check your indexing settings
Some pages should not be indexed. Drafts, internal pages, thank-you confirmations. Open the page's settings and toggle off "Show this page in search engines" for anything you don't want appearing in results.
For the rest, make sure indexing is toggled on. This sounds obvious, but it's one of the most common reasons new Framer sites don't show up on Google.
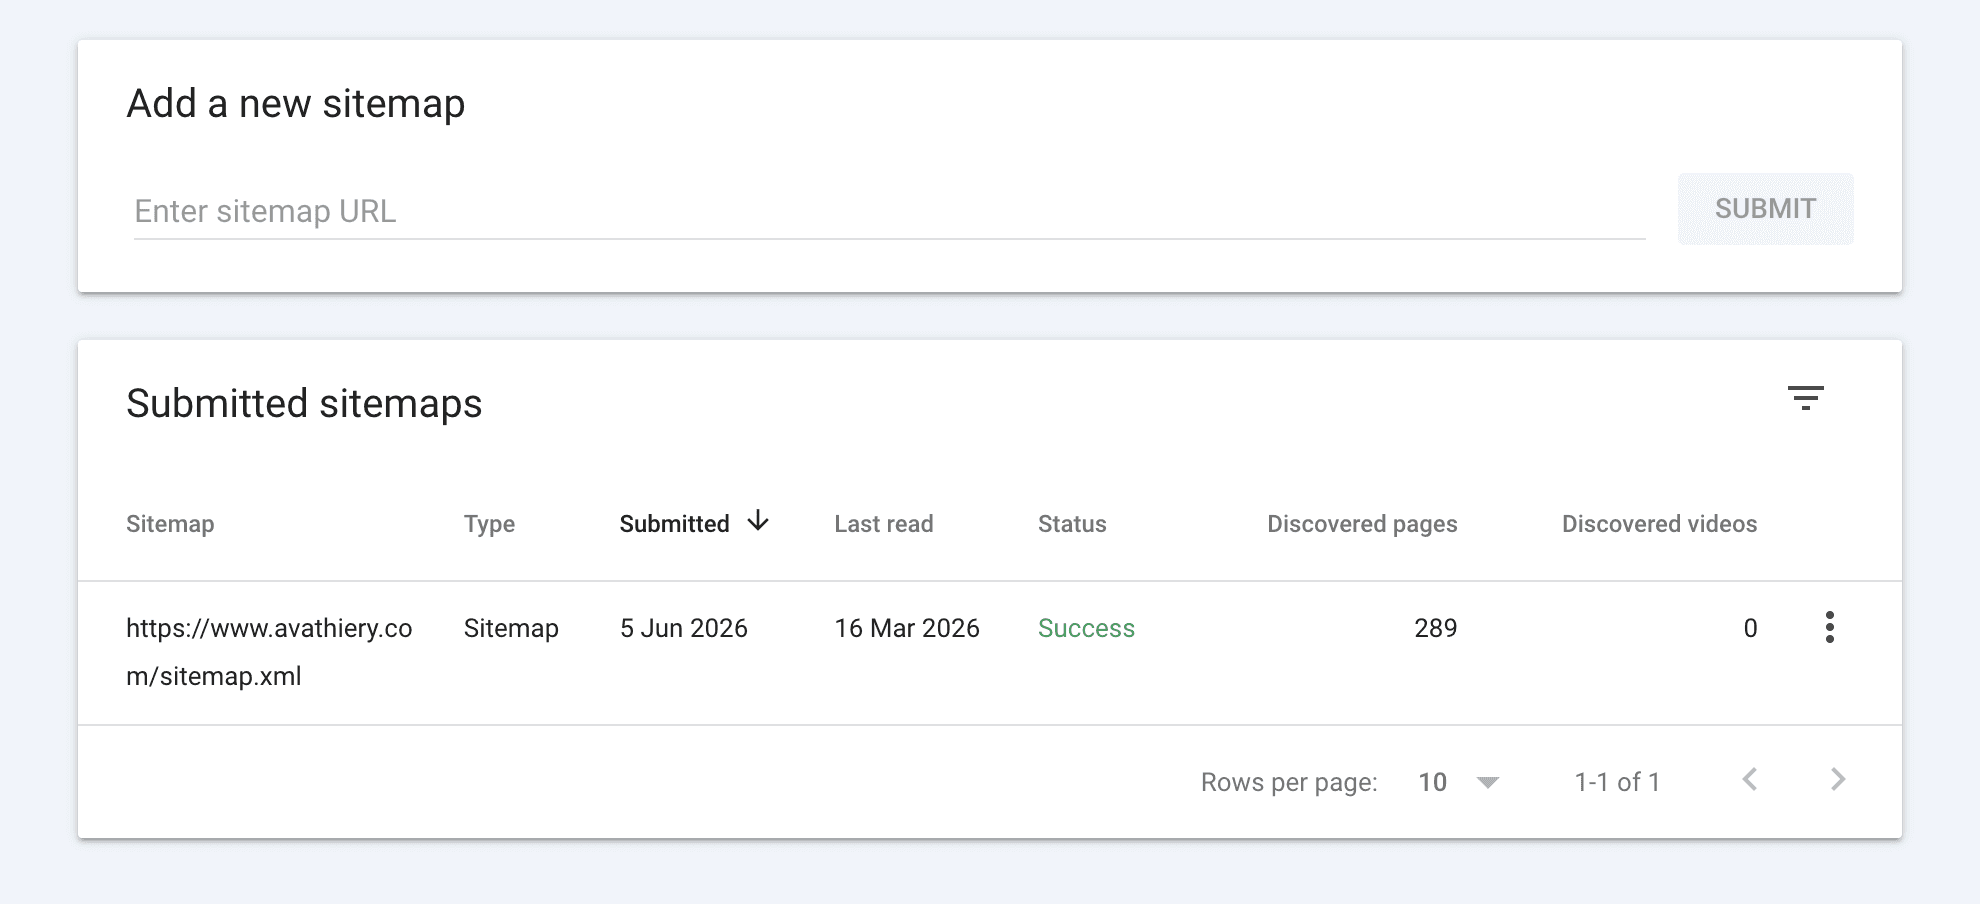
8. Submit your sitemap to Google Search Console
Framer generates a sitemap at yoursite.com/sitemap.xml automatically. Go to Google Search Console, add your site as a property, and submit that URL in the Sitemaps section. This is how Google finds and indexes your pages.
Without this step, Google will eventually find your site, but it'll take longer.
9. Set up 301 redirects when you change URLs
If you rename a page or restructure your site, the old URL needs to redirect to the new one. Framer handles this in Site Settings under Redirects. Add the old path and the new path, save, and you're done.
Skipping this breaks any external link pointing to the old URL and damages your rankings.
10. Add JSON-LD structured data where it helps
For articles, events, products, or FAQ pages, JSON-LD schema tells Google exactly what your content is. Framer supports custom code in the head of any page, which is where this goes.
You don't need it on every page. But on a blog post or a product page, structured data can mean the difference between a plain result and a rich result with stars, dates, or FAQ accordions.
Once the checklist is done
Most of these settings take five minutes each. The full checklist takes an afternoon, and it sets you up properly for everything that comes next.
The biggest mistake new Framer users make is publishing a site without going through this list. The design takes weeks. The SEO setup takes hours. Don't skip the part that determines whether anyone finds the site.
If you're starting from a template, both of mine (Orchid for agencies and designers, Squish for AI and SaaS) ship with SEO basics already configured. You still need to fill in your own content and meta, but the structure is there.
I'm Ava. I make Framer templates and write about design and development here. You can also find me on X.
I use AI as a writing tool — to improve my English, research topics, and develop ideas. Everything you read reflects my own perspective and experience as a designer.


